

Home > Blueprint AI > Documentation > Blueprint AI Version 1.0.0
Blueprint AI Version 1.0.0 – Documentation
Released October, 2024
Table of Content
Abstract
Document History
1. Introduction
1.1. Overview of Blueprint AI
1.2. Installation Prerequisites
1.2.1. Approval for Store Trial or Purchase
1.2.2. Acceptance of Store Terms and Conditions
2. Deploying Blueprint AI
2.1. Installation Steps
2.1.1. Install Application
2.1.2. Configure Users and Roles
2.1.2.1. Create User
2.1.2.2. Assign Blueprint AI Role
2.1.3. Configure System Properties
2.1.3.1 Development Instance
2.1.3.2. Production Instance
2.1.4. Configure ServiceNow Instance Records
2.1.4.1. Production Instance
2.1.4.2. Development Instance
2.1.5. Configure Products
3. Preserving Functionality
3.1. User
3.2. User Role
3.3. System Properties
4. Appendices
Glossary of Terms
Abstract
This document describes the install and configuration steps of the Blueprint AI scoped application installed from the ServiceNow Store.
Document History
Introduction
Welcome to the user guide for installing and configuring Blueprint AI on your ServiceNow instance. Blueprint AI is an advanced artificial intelligence (AI) application designed to enhance and streamline your ServiceNow Software Development Life Cycle (SDLC) processes and workflows, providing powerful insights and automation capabilities.
This guide is intended for ServiceNow administrators and will walk you through the necessary steps to successfully deploy and configure Blueprint AI. By following this guide, you will learn how to set up both production and development instances, configure essential system properties, activate relevant ServiceNow products, and customize various components to fit your organization’s needs.
Whether you are setting up Blueprint AI for the first time or optimizing your existing configuration, this guide will provide you with comprehensive instructions and best practices to ensure a smooth and efficient implementation.
1.1 Overview of Blueprint AI
Blueprint AI is a cutting-edge ServiceNow application designed to help platform owners and administrators streamline their Software Development Lifecycle (SDLC) process and automate many of the steps along the way using artificial intelligence. This powerful tool leverages AI to enhance efficiency, accuracy, and productivity, making it an invaluable asset for managing and optimizing your ServiceNow environment.
The key features of this release are designed to significantly improve your workflow. First, Blueprint AI simplifies the process of gathering and managing business requirements through streamlined data intake mechanisms, such as forms and data imports. It then moves on to automatically generate detailed technical designs, drastically reducing the time and effort required for manual design creation. With its capability for instant solution development, Blueprint AI allows for quicker deployment and iteration, accelerating your development cycle.
Blueprint AI includes several configurable workflow stages associated with the lifecycle of the Blueprint AI record. These stages can be turned on or off as needed, providing the flexibility to adapt to your specific processes and requirements. To further streamline decision-making and development, the application offers platform standards and default settings, known as component overrides, ensuring consistent governance and reducing the potential for errors.
Supporting both production and development instances, Blueprint AI allows organizations to test and refine their configurations in a controlled environment before deploying them to live systems. This dual-instance approach ensures that changes can be thoroughly vetted without disrupting ongoing operations.
Finally, Blueprint AI enhances user interaction through pre-configured chat questions that provide quick responses when interacting directly with the AI. This feature allows users to efficiently communicate with the AI, obtaining the information and support they need without delay.
Overall, Blueprint AI is designed to revolutionize the ServiceNow experience by automating key processes, improving decision-making, and accelerating development, making it an essential tool for modern platform management.
1.2. Installation Prerequisites
1.2.1 Approval for Store Trial or Purchase
Before you can install Blueprint AI, ensure that either a store trial or a purchase has been approved by Blueprint Solutions. This approval is necessary for the application to be available for installation. For purchases, Blueprint Solutions will collaborate with ServiceNow to set up the entitlement.
1.2.2 Acceptance of Store Terms and Conditions
After receiving approval from Blueprint Solutions, you need to agree to the ServiceNow Store terms and conditions. To do this, log into the ServiceNow Store and accept the terms and conditions.
2. Deploying Blueprint AI
Blueprint AI must be installed and configured on two separate ServiceNow instances: Production and Development, as outlined in (Figure 1). This setup is crucial because the application operates in the Production instance to collect requirements, initiate workflows, and gather user feedback. These processes are then transferred to the Development instance, where development activities such as coding, testing, and customization take place.
Figure 1

2.1 Installation Steps
2.1.1 Install Application
For more detailed information about these steps, please refer to the ServiceNow Docs article on installing a Store application, or search for “Install a ServiceNow Store application” on the ServiceNow Docs site.
1. Follow these steps in both the Production and Development instances.
2. Login as a user with the “admin” role.
3. Navigate to All > System Applications > All Available Applications > All (Figure 2)
Figure 2

4. Search for “Blueprint AI”
5. Select the version you want to install from the dropdown.
Note: By default the latest version will be selected.
6. Click the “Install” button
Note: The ServiceNow progress bar may appear to be stuck or remain at the same percentage for several minutes. If this happens, please continue to wait.
Note: Starting from the Vancouver release, you can choose to “Run in Background” if you prefer to perform other tasks while the installation is in progress.
7. Once the install is finished, click the “Close” button
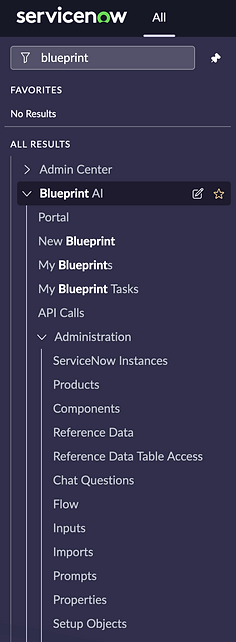
8. To ensure the application has been installed, refresh the browser and search for “Blueprint AI” in the application navigator. (Figure 3)
Figure 3
2.1.2 Configure Users and Roles
A new user needs to be created in the Development instance with the necessary access to enable communication between the Production and Development instances, as outlined in section 2.2 “Architecture”.
2.1.2.1 Create User
1. Login as a user with the “admin” role to the ServiceNow Development instance
2. Navigate to All > Organization > Users
3. Click “New” and create a new user with the following fields checked: (Figure 4)
a. User ID: blueprint
b. First name: Blueprint
c. Last name: AI
d. Active: true
e. Web service access only: true
f. Internal Integration User: true
4. Click “Submit”
Note: For detailed guidance on how to preserve this record during the next clone, refer to section 3 “Preserving Functionality”.
5. Click “Set Password”
6. Click “Generate”
7. Click “Save Password”
2.1.2.2 Assign Blueprint AI Role
1. Assign the following role to the new user: (Figure 4)
a. x_blsog_blueprint.api_user
Figure 4

2.1.3 Configure System Properties
2.1.3.1 Development Instance
1. Login as a user with the “admin” role to the ServiceNow Development instance
2. Change the application scope to Blueprint AI by: (Figure 5)
a. Clicking the Application scope menu item in the ServiceNow banner.
b. Search for “Blueprint AI” and select it.
Note: A red circle around the Application scope control indicates that a custom application scope is selected.
3. Navigate to All > Blueprint AI > Administration > Properties
4. Fill out the following fields: (Figure 6)
a. API Key for OpenAI:
Note: For detailed guidance on OpenAI API visit: https://openai.com/api/
5. Click “Save”
Figure 5

Figure 6

2.1.3.2 Production Instance
1. Login as a user with the “admin” role to the ServiceNow Production instance
2. Change the application scope to Blueprint AI by: (Figure 5)
a. Clicking the Application scope menu item in the ServiceNow banner.
b. Search for “Blueprint AI” and select it.
Note: A red circle around the Application scope control indicates that a custom application scope is selected.
3. Navigate to All > Blueprint AI > Administration > Properties
4. Fill out the following fields: (Figure 7)
a. API Key for OpenAI:
Note: For detailed guidance on OpenAI API visit: https://openai.com/api/
b. API Username for instance to instance communication:
Note: This is the user created in section 2.1.2 “Configure Users and Roles”
c. API Password for instance to instance communication:
Note: This is the password created in section 2.1.2 “Configure Users and Roles”
5. Click “Save”
Figure 7

2.1.4 Configure ServiceNow Instance Records
ServiceNow instance records facilitate communication between the Production and Development environments. To ensure effective communication, two instance records must be created in both the Production and Development environments. This setup allows each environment to interact seamlessly with the other. To maintain consistent sys_ids across environments, create the records in the Production instance first, then XML load them into the Development instance.
2.1.4.1 Production Instance
1. Login as a user with the “admin” role to the ServiceNow Production instance
2. Navigate to All > Blueprint AI > Administration > ServiceNow Instances
3. Click “New”
4. Fill out the form as follows:
a. Name: [Production Instance Name]
Note: The instance name identifies the specific ServiceNow instance. It is usually a unique identifier or a custom domain name associated with your organization’s ServiceNow environment. For example, in this URL the instance name is identified by instance_name: instance_name.service-now.com
b. Type: Production
c. Active: True
5. Click “New” again
6. Fill out the form as follows:
a. Name: [Development Instance Name]
b. Type: Development
c. Active: True
7. Go back to the “ServiceNow Instances” list view. (Figure 8)
8. Right click on one of the column headers and select “Export - XML” (Figure 9)
9. Click “Download”
Note: This will save the records locally in an .xml file
2.1.4.2 Development Instance
1. Login as a user with the “admin” role to the ServiceNow Development instance
2. Navigate to All > Blueprint AI > Administration > ServiceNow Instances
3. Right click on one of the column headers and select “Import XML” (Figure 10)
4. Click “Choose File”
5. Select the .xml file previously saved.
6. Both ServiceNow Instance records will be listed. (Figure 8)
Figure 8

Figure 9

Figure 10

2.1.5 Configure Products
The Blueprint Products section lists the ServiceNow products supported by Blueprint AI. All supported products are initially active. You can deactivate any products that are not in use within your organization as needed. This section also allows you to update products to include Process Participants for the Blueprint Workflow. Additionally, the Blueprint Products section provides a comprehensive list of all ServiceNow tables and configuration components that constitute each product, along with a set of predefined chat questions to interact with AI throughout the Blueprint Workflow lifecycle.
1. Login as a user with the “admin” role to the ServiceNow Production instance
2. Change the application scope to Blueprint AI by:
a. Clicking the Application scope menu item in the ServiceNow banner.
b. Search for “Blueprint AI” and select it.
Note: A red circle around the Application scope control indicates that a custom application scope is selected.
3. Navigate to All > Blueprint AI > Administration > Products
Note: A list of active Blueprint Products will be displayed (Figure 11)
4. Deactivate products as needed.
5. Update process participants with groups and/or users accordingly. (Figure 12)
Note: Any field left empty will automatically approve the corresponding workflow step.
Note: Any users or groups added to the process participants must have the x_blsog_blueprint.api_user role assigned to them to ensure they have the necessary access to interact with the Blueprint workflows. Without this role, they will not have the required permissions to participate in the process.
Figure 11

Figure 12

3. Preserving Functionality
This section provides guidelines on preserving essential configurations and records during the ServiceNow cloning process. For more detailed information about these steps, please refer to the ServiceNow Docs article on System clone, or search for “System clone” on the ServiceNow Docs site.
3.1 User
Detailed instructions on maintaining the newly created user record to enable continued instance communication. Specifically, it outlines how to preserve the user record created in section 2.1.2 “Configure Users and Roles”, to ensure seamless functionality post-cloning.
3.1.1 Login as a user with the “admin” role to the ServiceNow Production instance
3.1.2 Navigate to System Clone > Clone Definition > Preserve Data.
3.1.3 Click “New”.
3.1.4 Fill out the form as follows: (Figure 13)
3.1.4.1 Name: Blueprint User
3.1.4.2 Table: User [sys_user]
3.1.4.3 Conditions: User ID [user_name] is “blueprint”
Figure 13

3.2 User Role
Detailed instructions on maintaining the newly assigned user role to ensure continued instance communication and access. Specifically, this section outlines how to preserve the user role assigned in section 2.1.2 “Configure Users and Roles” to maintain seamless functionality after cloning.
3.2.1 Login as a user with the “admin” role to the ServiceNow Production instance
3.2.2 Navigate to System Clone > Clone Definition > Preserve Data.
3.2.3 Click “New”.
3.2.4 Fill out the form as follows: (Figure 14)
3.2.4.1 Name: Blueprint User Role
3.2.4.2 Table: User Roles [sys_user_has_role]
3.2.4.3 Conditions: User ID [sys_user.user_name] is “blueprint”
Figure 14

3.3 System Properties
Guidance on preserving critical system properties set up during configuration. Specifically, it outlines how to preserve the system properties for the API User and Password created in section 2.1.2 “Configure Users and Roles” to ensure seamless functionality post-cloning.
3.3.1 Login as a user with the “admin” role to the ServiceNow Production instance
3.3.2 Navigate to System Clone > Clone Definition > Preserve Data.
3.3.3 Click “New”.
3.3.4 Fill out the form as follows: (Figure 15)
3.3.4.1 Name: Blueprint System Properties
3.3.4.2 Table: System Properties [sys_properties]
3.3.4.3 Conditions: Name [name] is “x_blsog_blueprint.api_username” OR Name [name] is “x_blsog_blueprint.api_password”
Figure 15

4. Appendices
Glossary of Terms
Overview
Blueprint AI for ServiceNow introduces a powerful suite of AI-driven tools designed to enhance productivity, accelerate time-to-market, and reduce operational costs. By automating key aspects of ServiceNow development, Blueprint AI ensures a higher degree of accuracy and efficiency throughout the development lifecycle. This initial release focuses on streamlining business requirements, automating technical design, and rapid solution development.
Key Features
Streamlined Business Requirements
Blueprint AI intelligently analyzes business requirements to ensure completeness and accuracy. This reduces errors and rework, improving the overall quality of the final product.
Automated Technical Design
Based on the analyzed requirements, Blueprint AI automatically creates detailed technical design documents. This reduces manual design efforts and ensures a seamless, accurate technical build.
Instant Solution Development
Blueprint AI quickly analyzes the provided data and predefined parameters to generate solutions almost instantly, enabling rapid prototyping and accelerating time-to-market.
Additional Capabilities
Real-Time AI Interactions: Interact with Blueprint AI in real-time to adjust and refine generated requirements, ensuring alignment with project-specific needs.
Data Access Controls: Admins can configure data sharing with OpenAI to ensure data compliance, with access controlled through Products and Reference Data Table Access repositories.
Enhance your experience with Blueprint AI by following these best practices. Stay organized and ensure consistency across environments with these helpful tips!
Foundation Data
-
Ensure Foundation Data is Synchronized: Keep foundational data aligned across environments to prevent mismatches. For example, if a flow references an assignment group that exists in Production but not in Development, the group value may be incorrect or missing, leading to issues in flow execution.
New Blueprint - Service Catalog
Form and Flow Requirements
-
Define Groups Clearly in Flows: When designing flows, routing approvals, or assigning tasks, always specify "group" and provide an exact group name or the closest match to avoid confusion.
-
Specify Ticket Type: When outlining flow requirements, clearly indicate the type of ticket to be created (e.g., Incident, Task, Change) to ensure proper process execution.
-
Avoid Flow Naming Conflicts: Many Blueprints may have similar requirements, so avoiding creating flows with the same name is essential. When AI builds a flow, it checks if the flow already exists. However, if two Blueprints are being developed simultaneously, AI may create a new flow with the same name for both. This can cause issues when a catalog item is submitted, as it may trigger the wrong flow. To prevent this, do not submit multiple Blueprints for development simultaneously. Instead, complete one Blueprint before starting another to ensure unique flow creation and avoid conflicts.
New Catalog Item
Image Based Requirements
-
Use Clear Visual Indicators: Ensure mandatory fields, reference fields, and key elements are clearly marked.
-
Clarification on Icons: Avoid using extra icons such as the magnifying glass, upside-down triangle, or toggle switch. These can create confusion, making it unclear whether they represent mandatory fields or other functionalities.
-
Submit One Image at a Time: Avoid including multiple images in a request
-
Use High-Quality Images: Ensure the images are clear and adequately formatted before submission
- Check Image Orientation: Verify the correct orientation and rotation before submitting.
-
Avoid Workflow Format for Form Questions: When documenting form questions, do not present them in a workflow diagram. Instead, structure them based on the form layout.
New Blueprint - General
Tables, Dictionaries, and Forms
-
Avoid Workflow Format for Form Questions: When documenting form questions, do not present them in a workflow diagram. Instead, structure them based on the form layout.
-
Creating New Dictionaries: Clearly define the table where the new dictionary should be created.
-
Updating Existing Dictionaries: Always reference the correct field and table.